
When to use Trip Templates
- You have similar TRIPS that repeat quarterly, annually, etc.
- You require all of the same TASKS on your TRIPS
- You want to keep your descriptions, images, messaging, etc. across all of your TRIPS
When to use the Library
- You want to have consistent elements, but pick and choose which TASKS and HIGHLIGHT & ITINERARY ITEMS you include from the Library
- You can use both Templates and Library at the same time!
- Use the Sync feature when you want changes to Library items to "sync" to the TRIPS that use them
More on Templates
- Any YouLi TRIP that you create can be turned into a TEMPLATE
- Ultimately, a TEMPLATE allows you to create just one outline of a TRIP PAGE and then customize Trips from your Template, tweaking details as needed
- Your chosen dates for a TRIP created from a Template will automatically synchronize for both your ITINERARY and AUTOMATED TASKS
- There is no limit to how many TEMPLATES you can create & they are safely stored in your TRIP DASHBOARD
- Template Notes that appear in All Child Trips
- Template Notes can be set at the Template level apply to all child trip but also edited at the Trip level.

Turn a Trip into a Template
1. In your TRIP DASHBOARD, click on the cog from your perfect TRIP
2. Click "CREATE TEMPLATE"
3. Give your TEMPLATE a name
4. Click "Copy"
NOTE: Your new Template will live in your "Templates" tab, in your Trip Dashboard, until you publish it. See below for how to do that.
Use a Template to create a new Trip
- In your TRIP DASHBOARD, go to TRIPS I'M PLANNING > TEMPLATES
- Find the TEMPLATE you want to create a new TRIP from
- Click on the cog icon
- Select "CREATE TRIP FROM"
- In the popup:
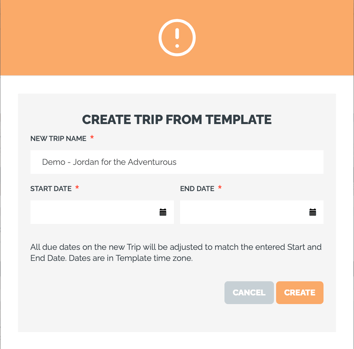
- Give the TRIP a name
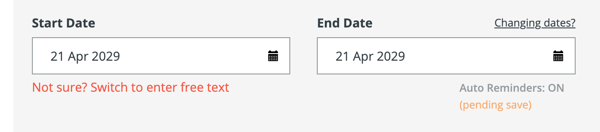
- If the TEMPLATE has set dates, you'll be prompted to:
- Pick the START DATE and End DATE for you Trip
- The items (like Itinerary dates, task due dates, payment due dates) will all adjust to match the new start date
- If the TEMPLATE has Free Text (not set dates)
- You will not currently be prompted to set dates in this case
- This is pending an update, watch release notes for 10608
- Click "CREATE"
Customize your Trip, created from a Template
After creating the TRIP, you can make all of the adjustments you need without impacting the TEMPLATE it was created from, such as:
- Different HIGHLIGHTS/ITINERARY ITEMS
- Modifications to AUTOMATED TASKS
- Change in PRICE
NOTE: Once you publish the Trip, it will automatically move to your ACTIVE tab and be accessible for traveler registration!
FAQs
Q: Why are payment due dates not aligned after creating a trip from a template?
For example:
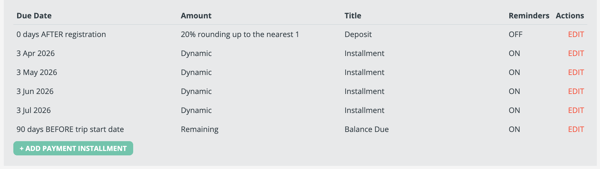
The template trip dates are set to 2029, but the payment dates are set to 2026. When I adjust the trip dates, they do not align properly.
A: This is because your template uses fixed dates. When you adjust the trip dates, the system shifts them relative to the trip start date, while the original date gaps remain inconsistent.
You may need to review the due dates for the trip, payments, and tasks one by one to identify any items that are not aligned—especially if some due dates were originally set in the past.
To avoid this issue in future trips, update the dates in your template payment plan so they are set correctly relative to the template start date. This way, when you edit the start date, all related dates will move as expected.