
AVAILABLE PLANS: Limited to PRO, Crew, Venture & Enterprise plans
NOTE: This feature requires Profile & Registration Tasks to be enabled on your account. If your plan qualifies (see above for plans that do), contact YouLi Support to enable.
What are Profile Fields?
YouLi Trip Pages are a portal for your Traveler to experience your TRIP before they travel. Part of the experience is getting to know the other people on the trip.
If your privacy policy allows and your group members want to know each other before, during and after, then this feature is for you!
What does a Profile look like?
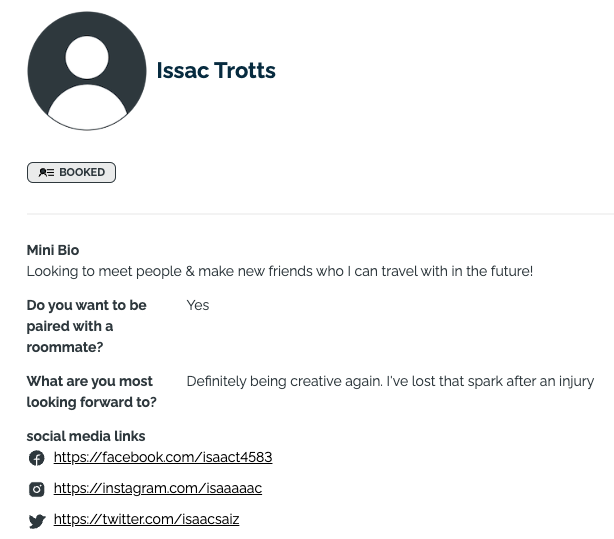
Here is an example of a PROFILE. You, as the Planner, will decide which PROFILE FIELDS show on a Traveler's Profile, only visible to you (the Planner) and them (the Traveler). And which Profile Fields also show publicly to all registered Travelers.
Options for displaying information from your Travelers
NOTE: When setting up your Profile & Registration Form, you will need to choose one of these three options for each entry (i.e. "Do you have any allergies?" is restricted to be Planner only, while "Tell us your favorite travel story" is only on the Full Profile, and "Are you looking for a roommate?" is on the Summary Card & Full Profile (so that it's visible without clicking into each profile).
See below for how to choose between these options.
1. Planner only
- This information will only be visible to you, the Planner
- Examples of information you may want to ask for, but do not want to share publicly on the PROFILE
- Allergy details
- Name given at birth
- Do you have any concerns about your level of athleticism, in order to do the level 4 hikes?
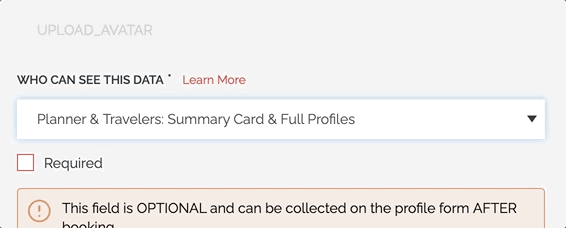
2. Planner & Travelers: Full Profiles
If you complete step 3 below, then you'll have the option to show information only on the FULL PROFILE.

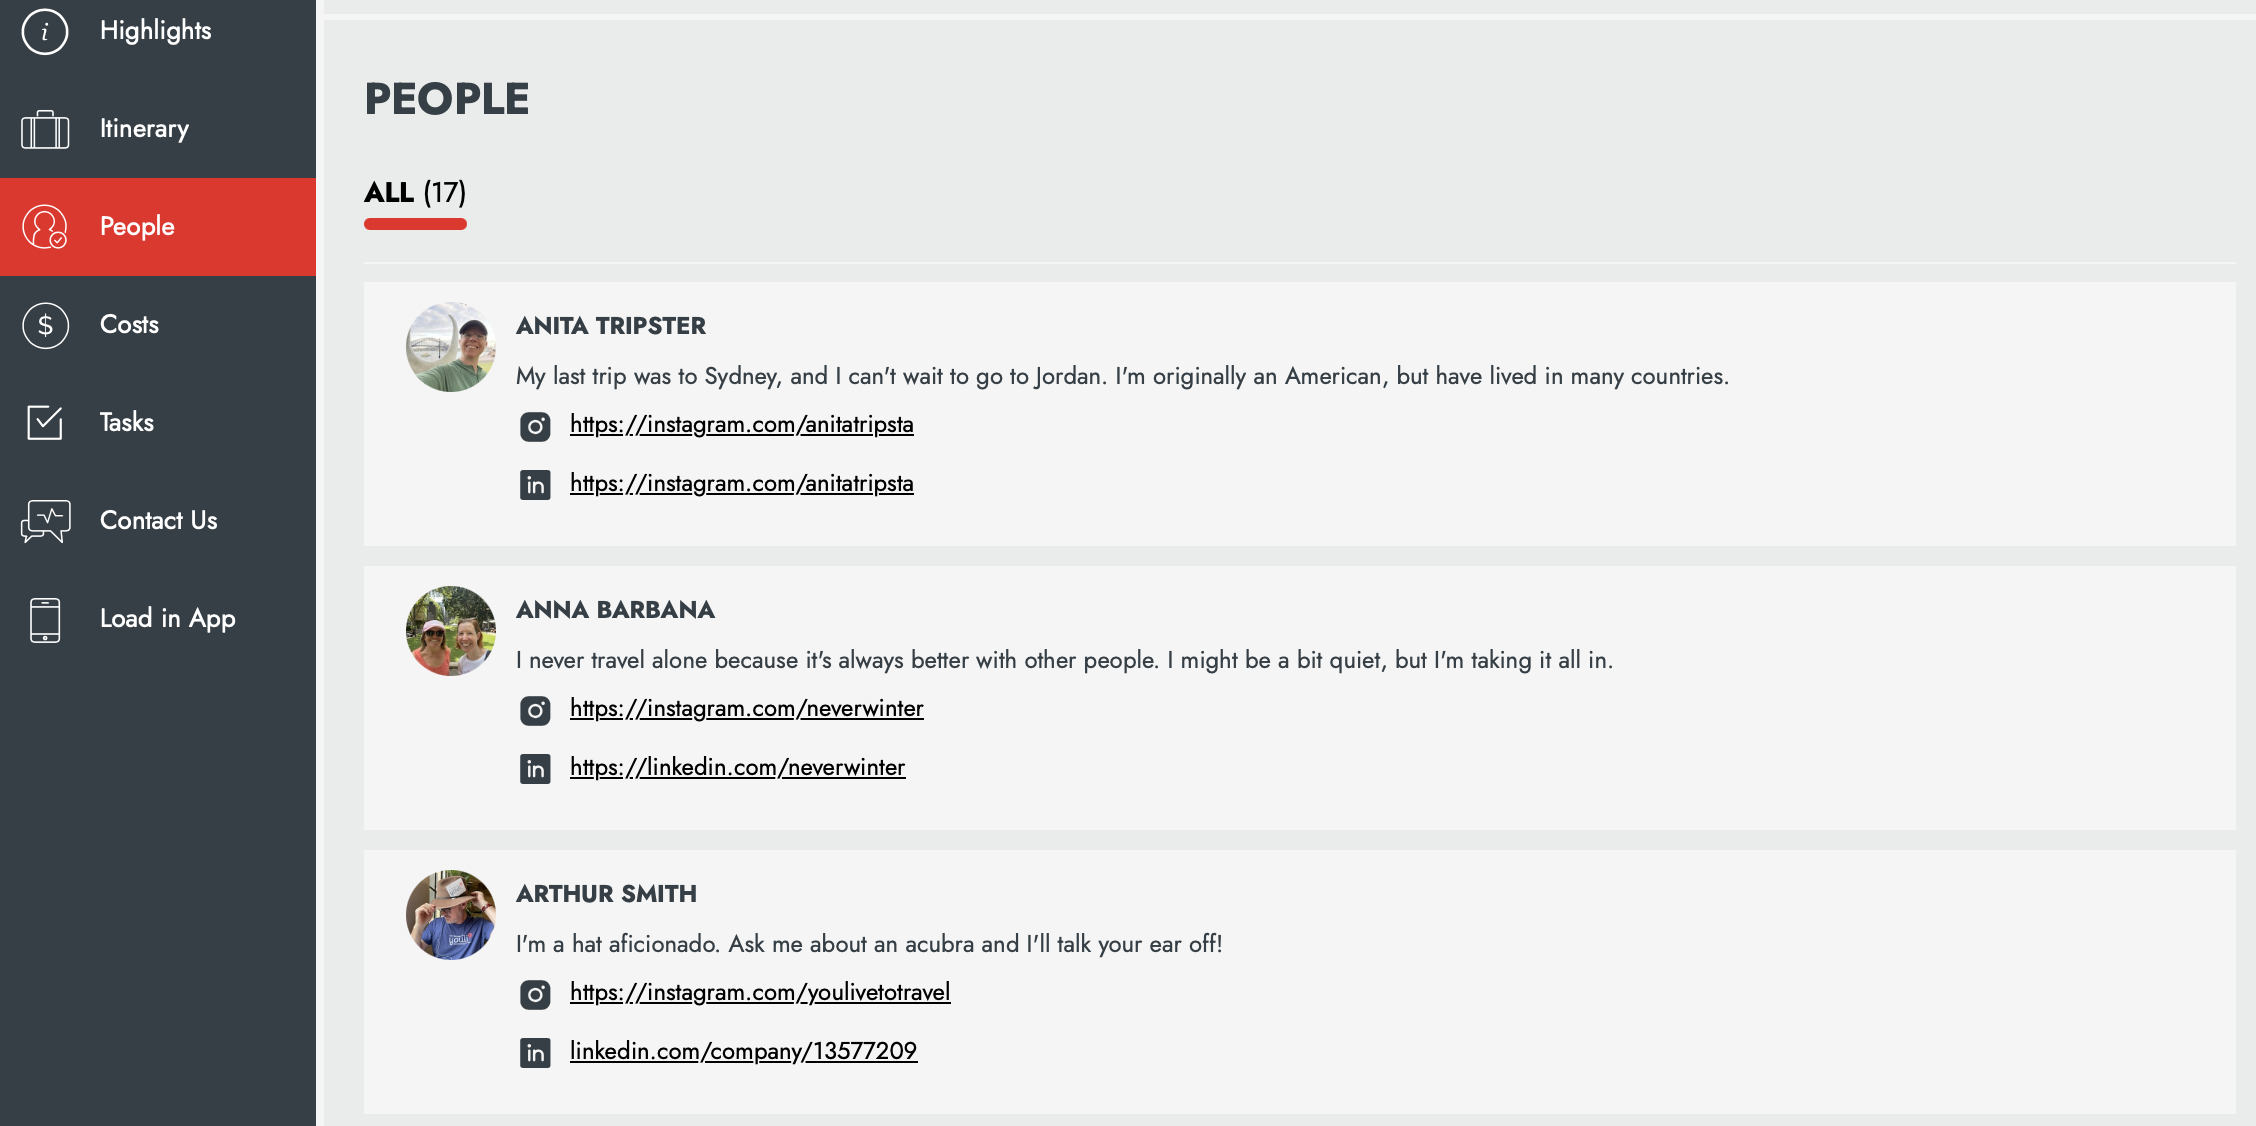
2. Planner & Travelers: Summary Cards & Full Profiles
If you choose this option, the entry will show on both the SUMMARY CARD and the FULL PROFILE, when people click to the "PEOPLE" menu. Again, we're referencing step 3 below.
This example includes these fields:
- First name
- Last name
- Avatar
- Mini bio
- Social profiles
How can a Traveler see their own profile?
There are three ways for your Traveler to access their own PROFILE
1. Hover over the Trip Name on a large screen and click "View Profile"

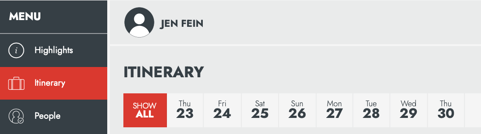
2. Click on their name in the bar above each section
Clicking "Jen Fein" is the example here
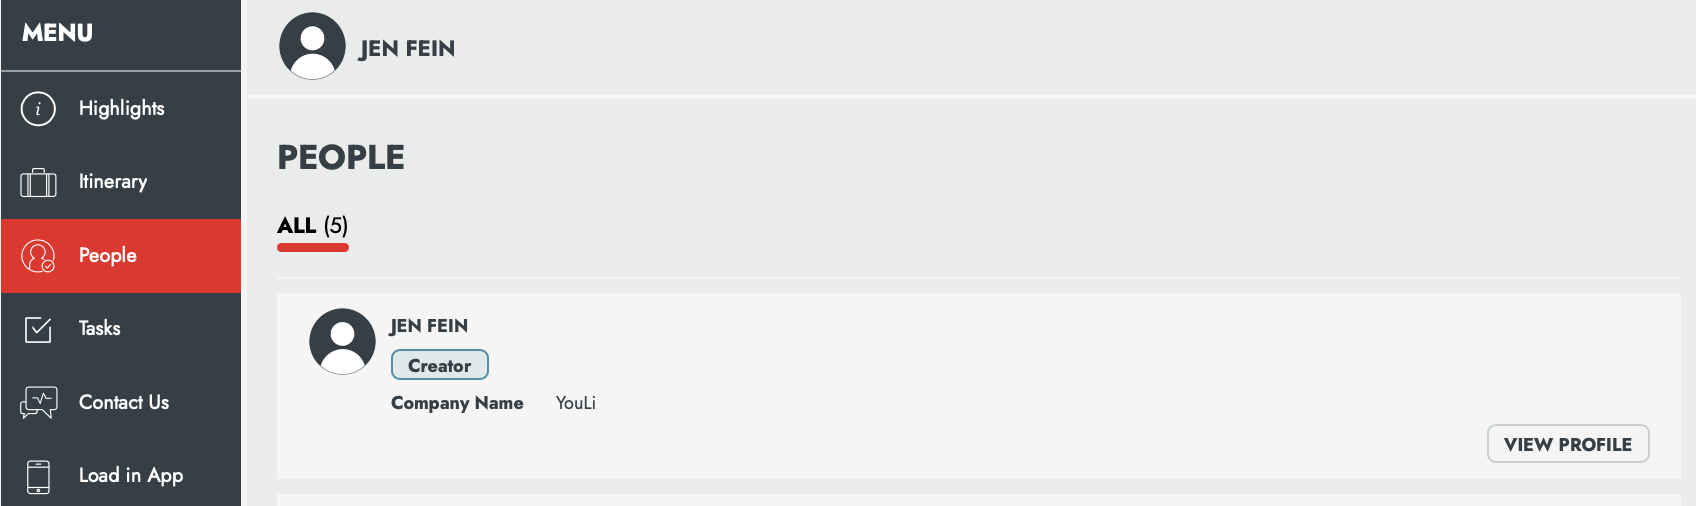
3. If the People tab is shown - click on their name or "View Proile" in the list
How to enable Profiles
1. Create a Profile & Registration Form Task
NOTE: If you've already created one, you can skip this step and move to the next one!👇
Follow these instructions to create a PROFILE & REGISTRATION FORM TASK
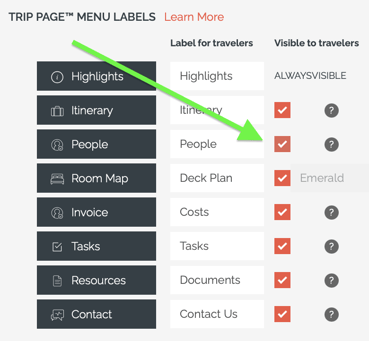
2. Enable the "People" menu
NOTE: The "People" menu is off by default!
-
- From your TRIP MENU, click on UPDATE TRIP
- Click on the SETTINGS tab
- Scroll down to the TRIP PAGE MENU LABELS section
- Relabel as necessary from "PEOPLE" to whatever is fitting for your brand (i.e. "LADIES," "ADVENTURERS," "ATTENDEES," etc.)
- Ensure the box is checked, to enable ✅
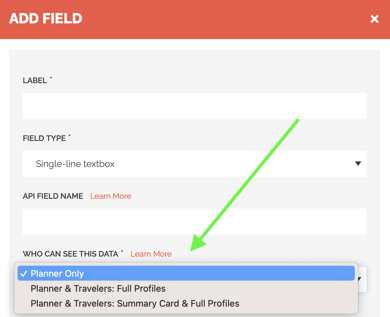
3. Update the "Profile & Registration Form" Task
- When you are adding/editing fields to the PROFILE & REGISTRATION FORM, you will see a field called "Who can see this data" (see image).
- By default, it is set to "Planner Only" to protect your Travelers' privacy.
WARNING: Check with your data security team to make sure you are sharing information that is safe to share. And be sure your Profile & Registration instructions make it clear which fields will be shown to other Travelers.
- Check your privacy policy and consider your customers' expectations, and then choose one of the other two Traveler facing options carefully:
Need more help?
Reach out to the YouLi support team via a chat box at the bottom of your screen or submit a ticket request. If you need more advanced support, schedule a 1:1 Consulting session with one of our experts, as we will walk you through the features and best practices.