
.png?width=350&name=Illustrations%20(1).png)
TIP: YouLi Trip Pages are very flexible. You can use them as landing pages to collect expressions of interest and make them Booking/Sales Pages when you're ready to take payments/bookings.
How to update the Trip Pricing Mode
- From your TRIP MENU, click UPDATE TRIP (the pencil icon) and then click PRICING to see your TRIP PRICING MODE
- You can toggle between the two modes
- Click SAVE CHANGES once you have decided on the correct TRIP PRICING MODE for your flow
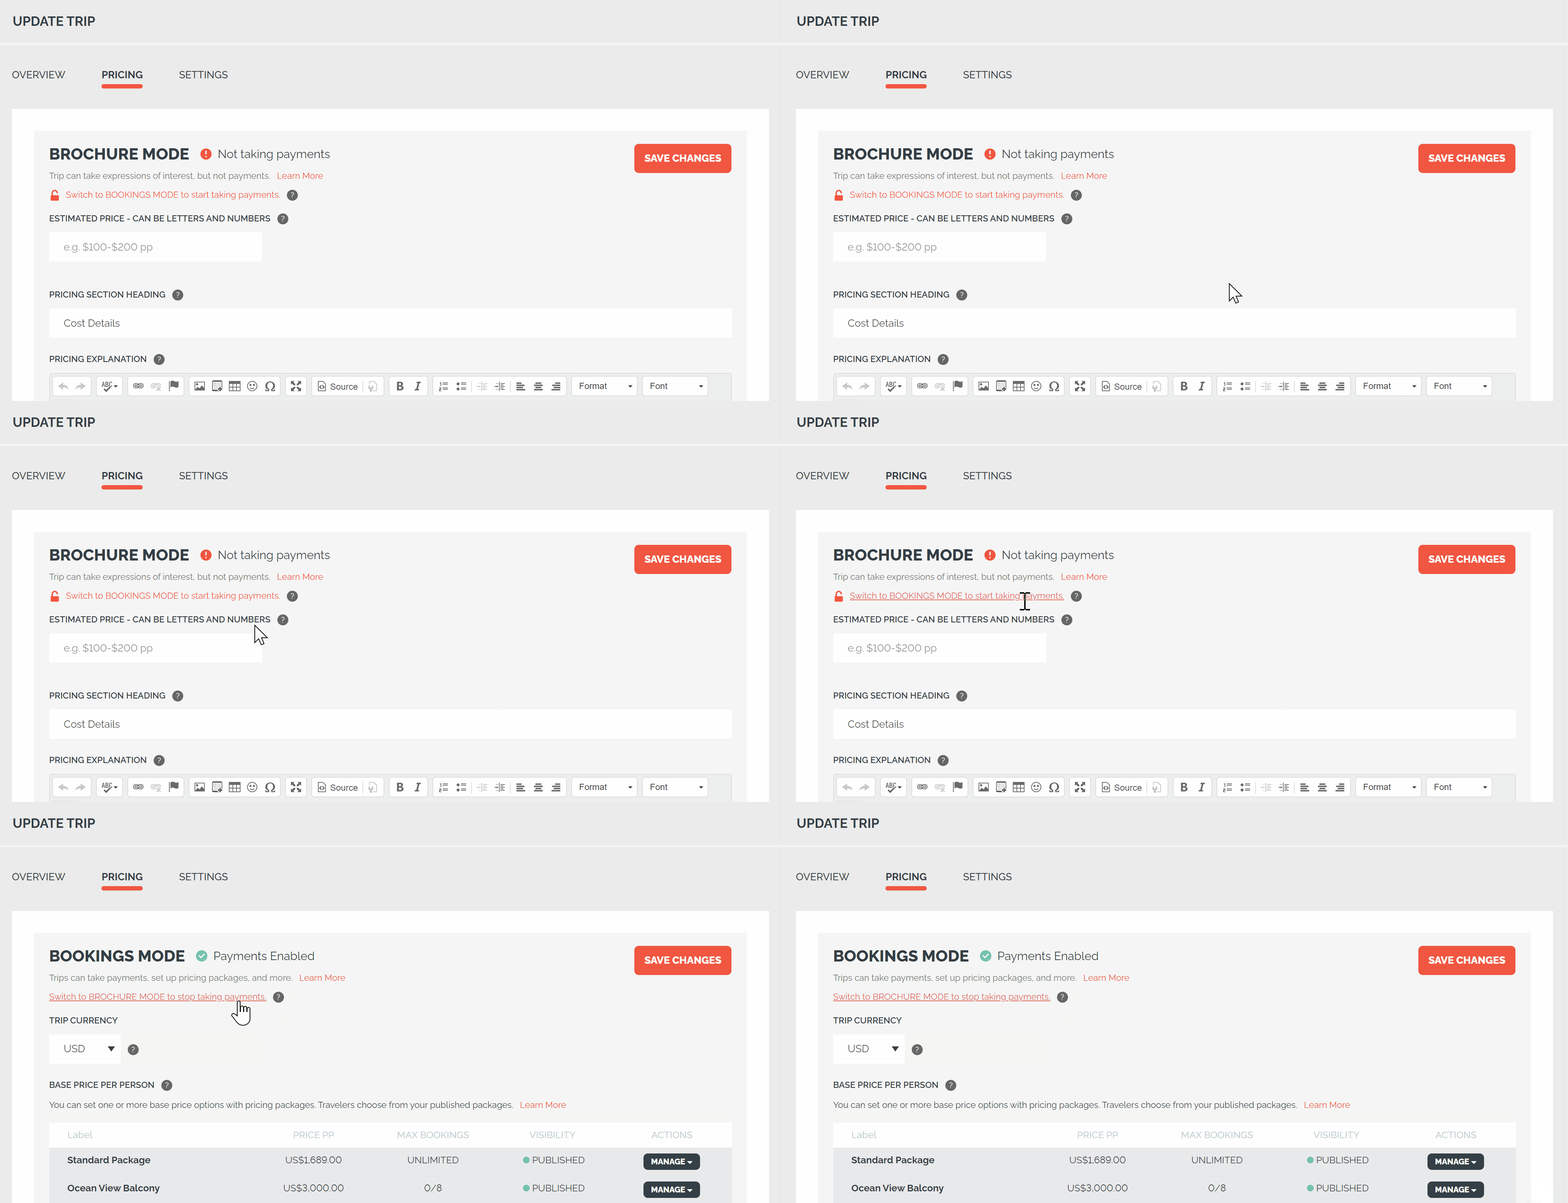
Brochure Mode
NOTE: Choose "Brochure Mode" to offer estimated pricing.
With Brochure Mode you can
- Share beautiful itineraries with HIGLIGHTS and images that bring your trip to life
- Collect email registrations for expressions of interest
- Request email registrations for free events
- Assign TASKS for form completion and travel document collection
- Display trip ideas (via itinerary / highlights), but the inability to pay, to garner interest which can then help you create a custom trip for your traveler
TIP: You can switch your Trip Pricing Mode anytime! Just be sure to click "Save Changes" and you'll see the change reflected on your Trip Page.
Bookings Mode
NOTE: Choose "Bookings Mode" to offer finalized pricing.
With Bookings Mode you can:
- Take immediate payments online (by connecting Stripe, for credit cards!)
- Collect email registrations for a paid experience
- Assign TASKS for form completion & travel document collection
- Share beautiful itineraries with HIGHLIGHTS and images that bring your trip to life
- Take payments with up to 5 payment methods
- Credit cards via Stripe or Square - with the ability to add a surcharge
- Direct bank transfer, PayPal, Phone or Donation Link
- Create a Payment Installment Plan
- Add multiple packages for different base price options, for example:
- Standard - $3,000
- Deluxe - $6,000
- Ocean View Suite - $3,500
- Trip + Donation - $5,500
- Set a base price and then make Itinerary Add-ons for people to build their own perfect trip
TIP: Still not sure which mode is right for your Trip? Go ahead and pick one, see how you go, and change it as need to!
FAQ: Why Do Travelers Show as “Booked” After Converting a Trip from Brochure Mode to Booking Mode?
Question
I converted my trip from Brochure Mode to Booking Mode, and some travelers are now showing a Booked status or even though they have not selected a package. Why is this happening, and how can I fix it?
Answer
When switching from Brochure Mode to Bookings Mode, traveler statuses are determined by the packages they were previously assigned to (or are currently assigned to) rather than just the packages available on the trip.
For example, if a trip was previously in Bookings Mode with the following setup, and then changed to Brochure Mode and back to Bookings Mode:
- Traveler A (on a $10 package, no payment made) -> will show as NOT booked
- Traveler B (on a $10 package, payment completed) -> will show as Booked
- Traveler C (on a free package) -> will show as Booked
- Traveler D (has not selected/been assigned a package) -> will remain NOT booked
But if you still see the D case, where the traveler has never been assigned a package and the trip has never had any packages added, but the traveler is still shown as Booked after converting to Booking Mode, please use this workaround to correct it. We are aware of this issue and are currently working on a fix.

The recommended approach is to assign the appropriate package to each traveler.
This ensures that booking and payment information is calculated correctly and that travelers are charged the correct amount.
If you have a large number of travelers, you can also refresh their status using Bulk Edit:
- Select the affected travelers.
- Click Bulk Edit.
- Change their status to Invited or Registered and save.
Alternatively, you can:
- Select the affected travelers.
- Click Bulk Edit.
- Update the Planner Note field and leave it blank.
- Save your changes.
After the traveler profiles are updated, their payment status will automatically refresh and display as Not Booked. Travelers will then be able to select the package they require and complete the booking process normally.