
Drag and Drop is available in all plans right now
Use the Content Library to organize your Highlights and Itinerary
What are Highlights?
HIGHLIGHTS always appear with large images. Think of your Highlights as key reasons people will want to join your trip, the top experiences you are going to take them on!
These are displayed with the photo as the focus, with the text less emphasized, to really catch your travelers' eyes and get them excited about the trip you have created.
TIP: If you prefer, you can choose to feature your Highlights in the Itinerary section too, by checking the box "also show on Itinerary" when you edit or create a Highlight item.
What should I add to the Highlights?
Under HIGHLIGHTS, you should emphasize things like:
- The best of the best! Your most exciting activities. What will sell people to book your trip?
- Your cause or mission (or perhaps more information on your organization/company)
- A partnership
- Bio(s) for your Tour Guide(s)
What are Itinerary Items?
In the ITINERARY, you can create day-by-day summaries or detail hour-by-hour activities.
These appear with a small image and mostly text, shown together. Think of these as more text-focused and use your ITINERARY to make sure all of the details are provided.
NOTE: You can feature these in the HIGHLIGHT section too, by checking the box "also show on highlights" when you edit or create an ITINERARY item.
What should I add to the Itinerary?
Lay out all of the details of the trip, for your travelers (including dates & times, if you have them).
This may include:
- Meals
- Flights and other transportation (i.e. shuttles or ferries)
- Rest periods
- Specific activities (i.e. hike, meeting, yoga class, etc.)
Enhanced Itinerary Items
In addition to standard Itinerary Items, you can use Enhanced Itinerary Items to manage flights, room allocations, and transfer windows. Please see the help article below to check whether this is included in your plan.
-
Flight Booking - Contact Sales to discuss integration options
Building further on our Sponsored feature integrating with Sabre for flight bookings - Planners will now be able to see extensive data about the flight booking - not just the segment flight data, but also fare data, baggage, etc.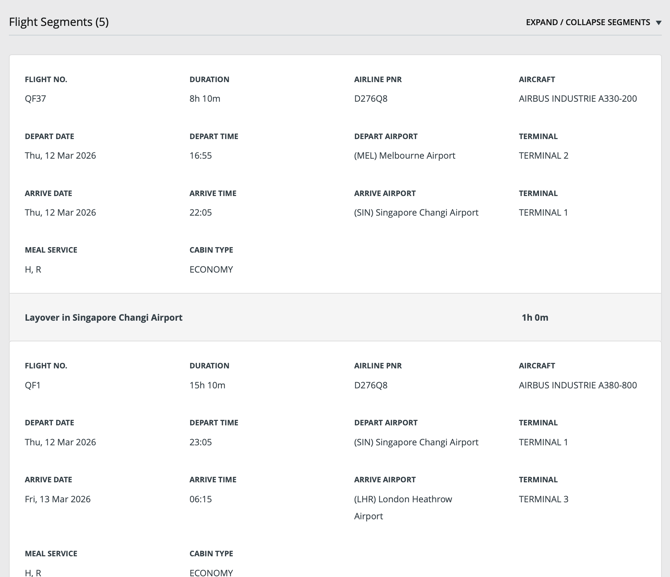
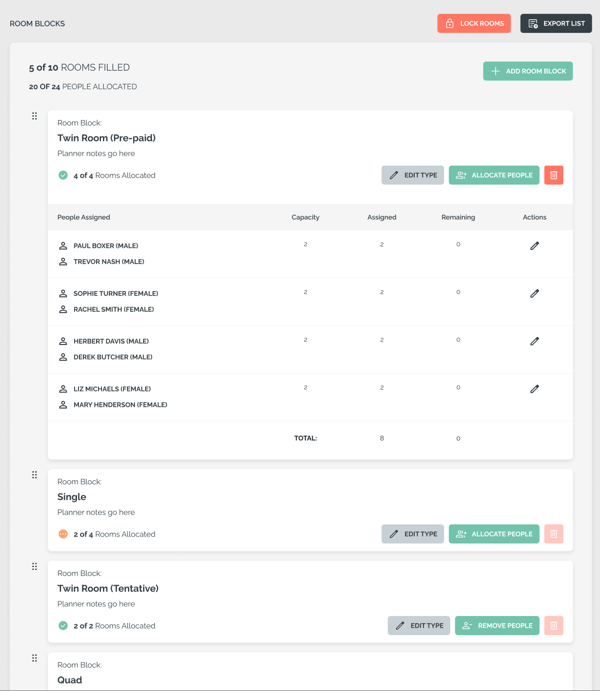
Have you ever needed to manage room allocations across MULTIPLE accommodations in the trip, where people room with different people in each location because of different room configurations in each hotel - so the package level room inventory doesn't quite cut it?
If you publish a Transfer Window and then need to allocate people to transport based on when their flights arrive - you need the "Transfer Window" feature.

How do I create or make changes to the Highlights or Itinerary?
- From your menu, click on the MANAGE HIGHLIGHTS & ITINERARY tab.

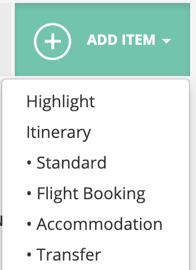
2. Click "Add item"
3. As your scroll, you can customize:
- Name
- Item Type - This is where you can choose highlight, itinerary, or both!
- Date & Time - If your trip has dates set, then you can pick a date & time for your item; if not, you can select "Full day event" (without a specific time).
- Images - Don’t forget to update the image on each item. As mentioned above, images are shown differently, depending on the type of item. Play around and see what works best for you. If you would like more support on inserting those images, watch this help video on formatting & adding images and links.
- Optional Item - This is where you can make this Highlight or Itinerary item optional (and communicate a cost -- if there is one -- and when it can be paid). See here, for more on adding optional add-on items.
- Item Description
- Cost - For optional add-on activities, upgrades, etc.
- Location - enter a location, pick from the geolocation list or just enter a string. This can even be a URL
- By default this is linked out to Google Maps like this on the Trip Page:

- By default this is linked out to Google Maps like this on the Trip Page:
- "Don't show on TripPage Map" - Decide whether or not you would like this item to appear on your TRIP PAGE MAP
NOTE: The Trip Page Map feature is only available for our PRO, Venture & Enterprise plans.- If this is checked, the item will NOT appear on the map
- AND the item will NOT be linked out to Google maps like this:

- Visibility - You can choose who sees the HIGHLIGHT or ITINERARY item.
NOTE: This is particularly useful if you're creating an activity, as a shoulder event for a specific person or family, within a larger group trip.
4. Don't forget to click PUBLISH!
5. Finally, be sure to click on "Preview: As Registered" at the top of your trip page, to ensure that your HIGHLIGHTS and ITINERARY look exactly as you want them to, for your travelers.
Are you more of a visual learner? Here is an example of how Highlights vs. Itinerary look, on a YouLi Trip Page.
NOTE: You can see in the example above that there are Optional Items in both the Highlights and the Itinerary. You can turn this feature on and off.
Troubleshooting
Why are there extra days beyond my Trip End Date?
If you're using the Drag and Drop interface, you might see extra days beyond your Trip End Date, this video explains why they might be and how to fix it
Why do the links inside the itinerary card overflow in the mobile view?
These are URLs that cannot be wrapped since there are no spaces.
You can either use the page title and embed the link in the text, or choose a shorter link to avoid overflow.

How can I get rid of the location description ahead of each highlight in the preview?
Simply remove the 'Address of Location' field on your Highlight item:
