
Sending messages and invites
There are four places for Planners to send a message to people; each one is detailed below. Messages are sent within the context that is relevant in that place/section. Scroll down to view each of these 4 places in YouLi.
- Manage People & Reports
- Manage Tasks & Custom Forms
- Manage Payments
- Manage Optional Itinerary Responses
From Manage People & Reports
From MANAGE PEOPLE AND REPORTS, there are two ways you can invite people to a trip or send messages
- To enable the different send buttons, simply click the checkbox(es) next to the name(s) of the person/people you want to message or check the box in the header to select all.
- Be sure to use the FILTER option to select only the people you need to contact.
Send an invitation:
Add person first, then click SEND INVITE, you'll be prompted to confirm and send the invite
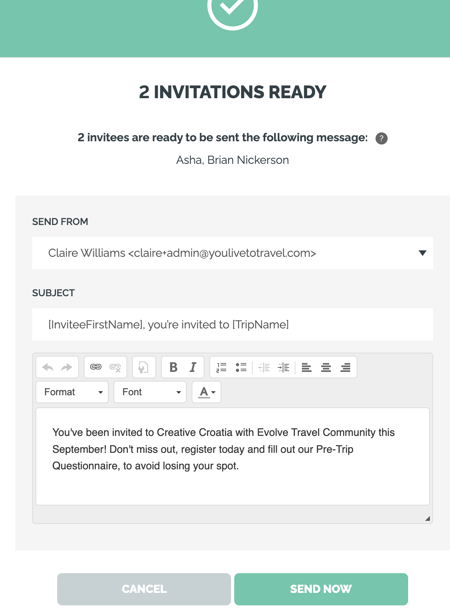
- SEND FROM is set to the Planner, or the Main Contact if the current Planner is not Listed as a Contact on the Trip. Select from the drop-down to choose another Planner who is.
- Be sure to get White Label Email Sending setup so that your emails are authenticated and are more likely to go to the inbox.
- SUBJECT defaults to [InviteeFirstName]; you're invited to [TripName]. Read our article about shortcodes to learn more.
- MESSAGE defaults to the invitation message configured in UPDATE TRIP > SETTINGS but can be changed before sending.
- Using SHORTCODES will allow you to send one email without worrying about filling in each traveler's individual information. Learn more
Send a message:
After you click SEND MESSAGE, you'll be prompted to enter your message:
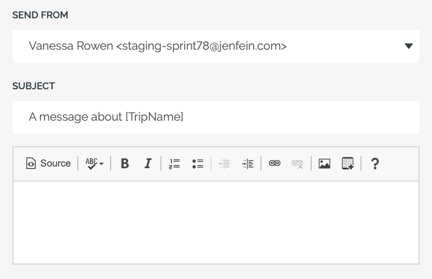
- SEND FROM: Is set to the Planner, or the Main Contact if the current Planner is not Listed as a Contact on the Trip. Select from the drop-down to choose another Planner who is.
- SUBJECT: Defaults to A MESSAGE ABOUT [TripName]
- MESSAGE: Defaults to blank; this is your chance to wax poetic or keep it short and witty.
- BUTTON: The call to action in the email will be VIEW TRIP.
From Manage Tasks & Custom Forms
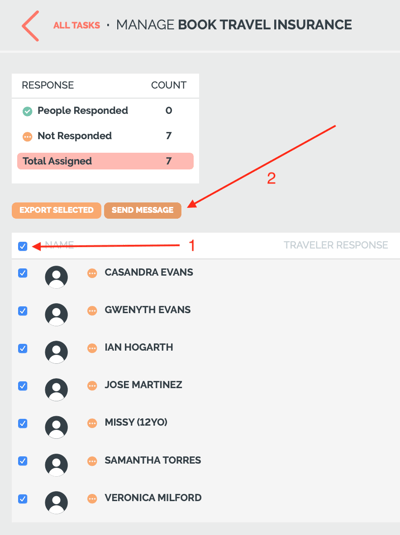
If you need to personally chase people up about TASKS they have or have not completed, you can filter by who has responded and who has not and then send a message directly from MANAGE TASKS & CUSTOM FORMS.
- From your TRIP MENU, click on MANAGE TASKS & CUSTOM FORMS
- Click RESPONSES under the TASK you're looking for (or the icon that looks like a clock, under ACTIONS).
- You can then check the boxes for the people you want to contact (or select all) and click SEND MESSAGE.
From Manage Payments
If you need to personally chase people up about missed (or anything related to) payments, click into MANAGE PAYMENTS.
CAUTION: Automated reminders to pay might be enabled for Installments, so you might want to wait for the personal touch until either after the last reminder is sent or way before the first reminder gets sent.
How to message within this context
- From your TRIP MENU, click on MANAGE PAYMENTS
- You'll see the REGISTERED PEOPLE tab and who has paid/not paid. Be sure to use the FILTER to select only the people you need to contact.
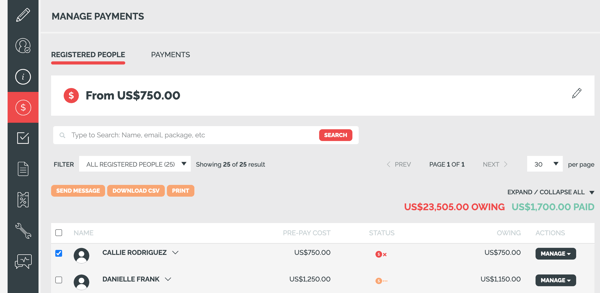
- Click SEND MESSAGE
From Manage Highlights & Itinerary
How to message about responses to Optional Itinerary Items
If you need to personally chase people up about OPTIONAL ITINERARY ITEMS, be sure to use the FILTER option to select only the people you need to contact.
- From your TRIP MENU, click on MANAGE HIGHLIGHTS & ITINERARY
- Find the specific OPTIONAL ITINERARY ITEM and click on the number of RESPONSES
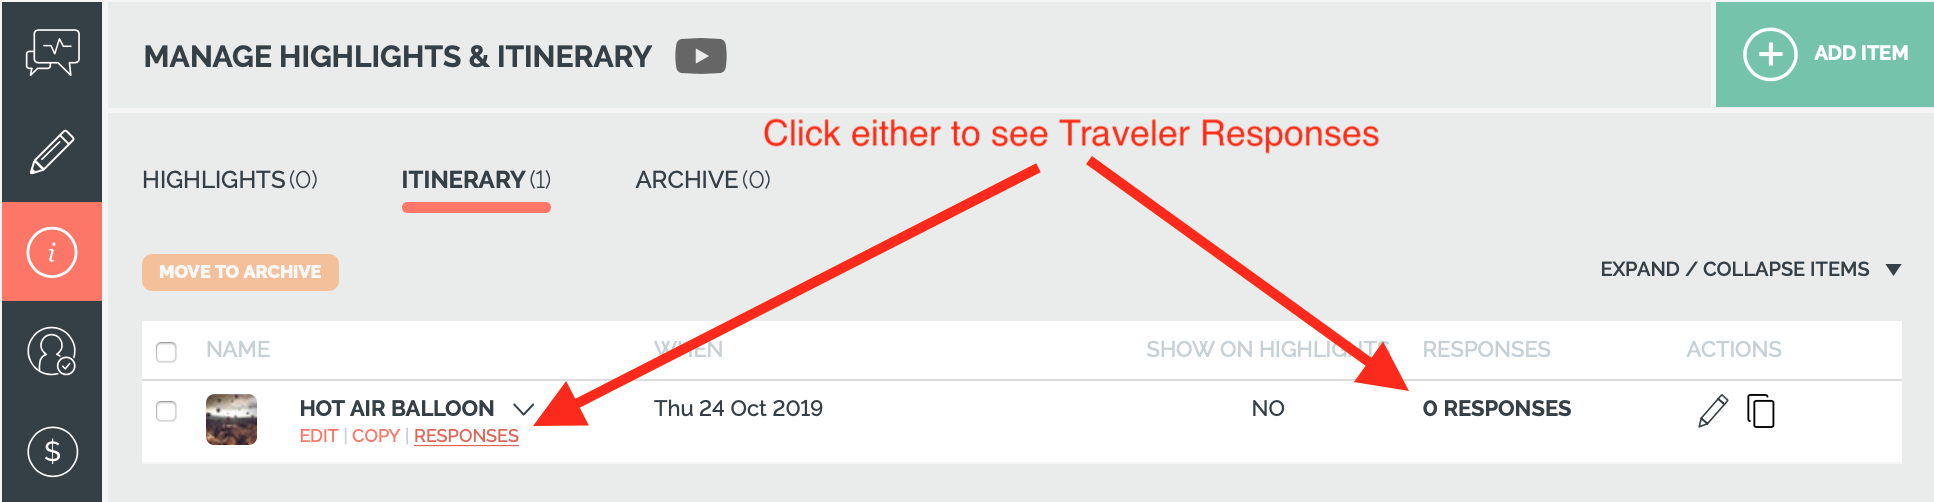
- Here's an example of what you would then see (this particular item has 0 responses)
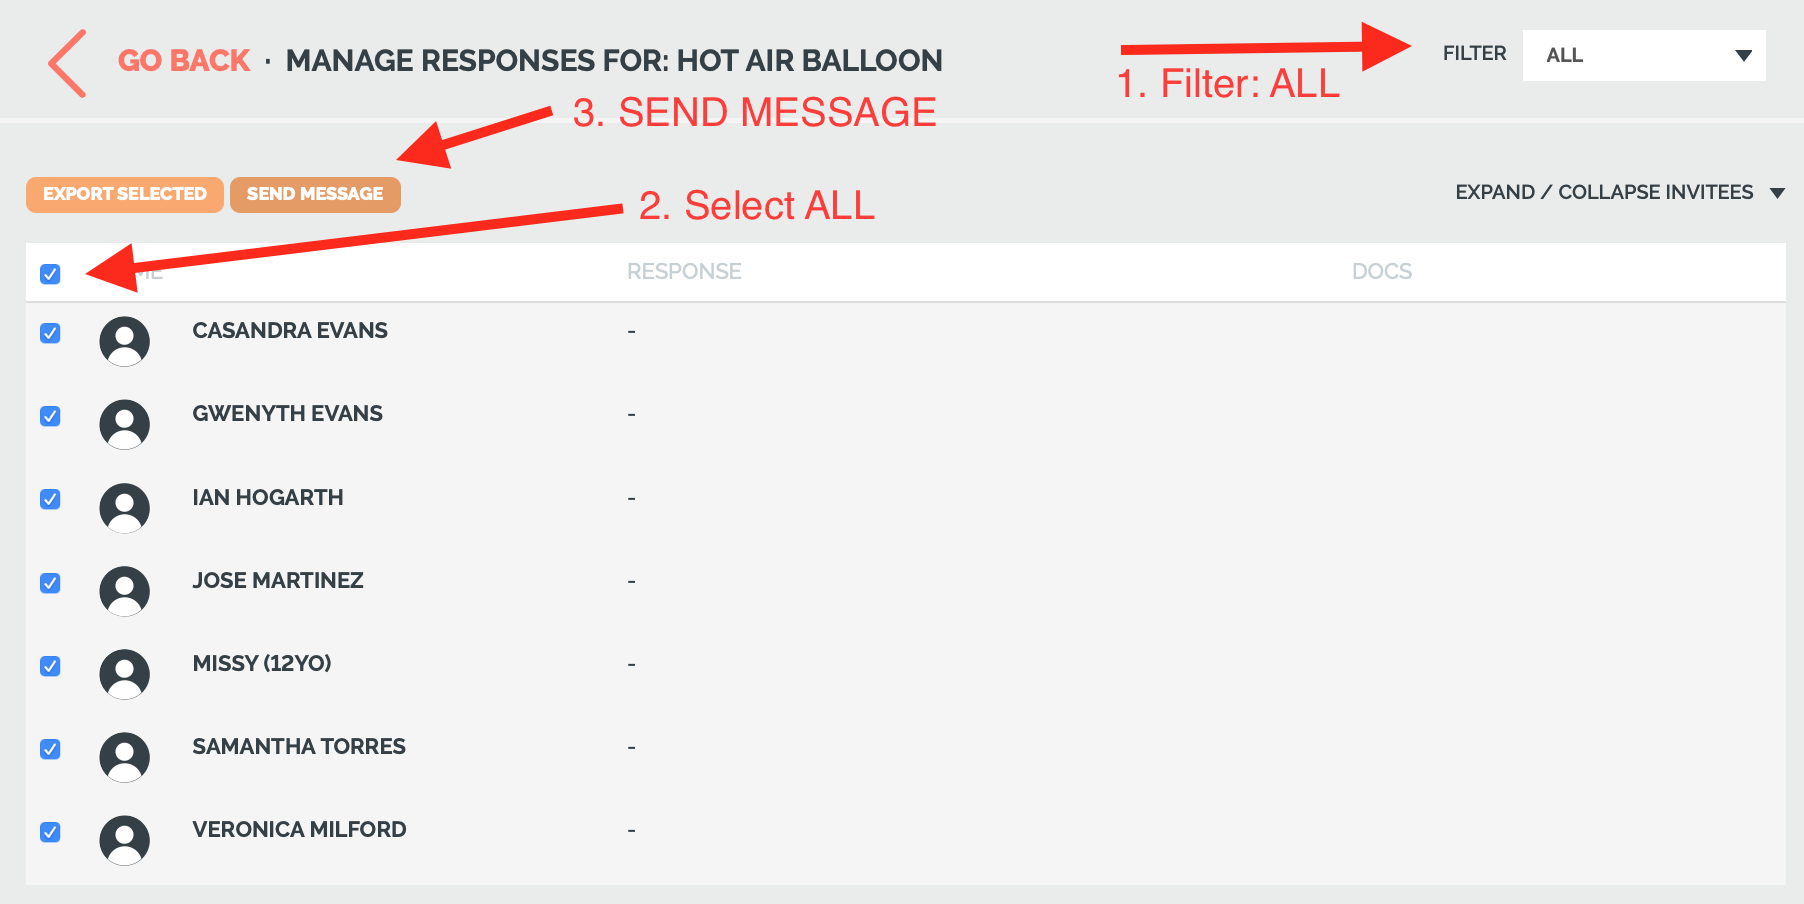
- Select anyone you want to send a message to (or select all)
- Then click SEND MESSAGE
Who are messages sent from?
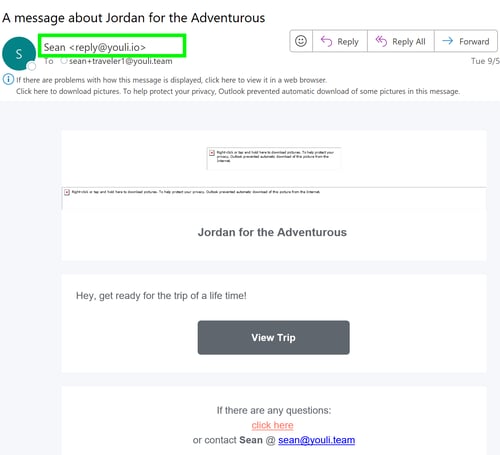
Messages sent from YouLi will show the name of the Trip Contact you chose to SEND FROM. However, in place of their email address, you will see reply@youli.io
I do not want my Travelers to see anything about YouLi. Can I white label the send from?
Yes! We offer White-Label Email Sending (WLES) for a fee. Contact us to ask about pricing and eligibility. In the image below, you will see the address next to FROM is set to the company domain:

Need more help?
For more tips on pre-trip customer support join the YouLi community of travel professionals with monthly LIVE webinars and Q&A sessions.